Table of Contents
Game Boy Advance SP not charging?
Friends, there’s a new article on the site: EZ-Flash Air Review: Features, Limitations, and Comparison with Other Models.
ChisLink - a revolution in the GBA world.
Friends, AliExpress now has:
Cool metal labels for Game Boy Advance consoles. Important: the OMEGA series will no longer be produced — it is being replaced in the lineup by the EZ-Flash Air.
Cool eXtremeRate cases for GBA SP.
Friends, help me buy (if you have) various old stuff: Help me buy.
What to do if the Game Boy Advance SP is not charging? Mostly, this is expressed in one way: the red light turns on and immediately goes off. There are different reasons why this happens, and it doesn't always mean that the Game Boy Advance SP is broken. It could be related to external causes or a misunderstanding of how the Game Boy Advance SP works.
Check externally:
Before opening up the Game Boy Advance SP, check the most basic things:
1. The most important! The light may turn on and immediately go off on your Game Boy Advance SP not because something is broken, but because it is fully charged! That is, you need to play on the Game Boy for about 10-30 minutes and try charging it again. If after playing the light turns on and stays on, then you have no problems.
2. Check the power strip and the outlet you are using to charge the Game Boy Advance SP with another device. If everything is fine and the outlet works, then move on.
3. Check if the charger is working.
4. Check if the battery is working.
There are many videos and articles on how to check the charger or battery with a multimeter, so we won't dwell on this.
In fact, these are important reasons why the Game Boy Advance may not charge, about 10% of the devices that ordinary people bring in for repair do not turn on precisely for these reasons, despite the fact that you think that "someone is just an idiot" and this definitely won't happen to you, check these reasons! :)
Check internally:
So, you've gone through all the checks above and the Game Boy Advance SP still isn't charging.
In this case, the problem is inside, and to check what happened, you need to disassemble the console.
I won't show how to disassemble the console, you can read about it in the article: How to properly disassemble the Game Boy Advance SP?, so let's move straight to the stage where you have already removed the motherboard.
So, we disassembled the console and took out the Game Boy Advance SP motherboard, what to check next?
Oxidized contacts
The first thing to check is whether the contacts that go directly to the battery have oxidized. Not the most common problem, but it happens.
They are located here:

Blown fuses
The Game Boy Advance SP may not charge if the fuses are blown.
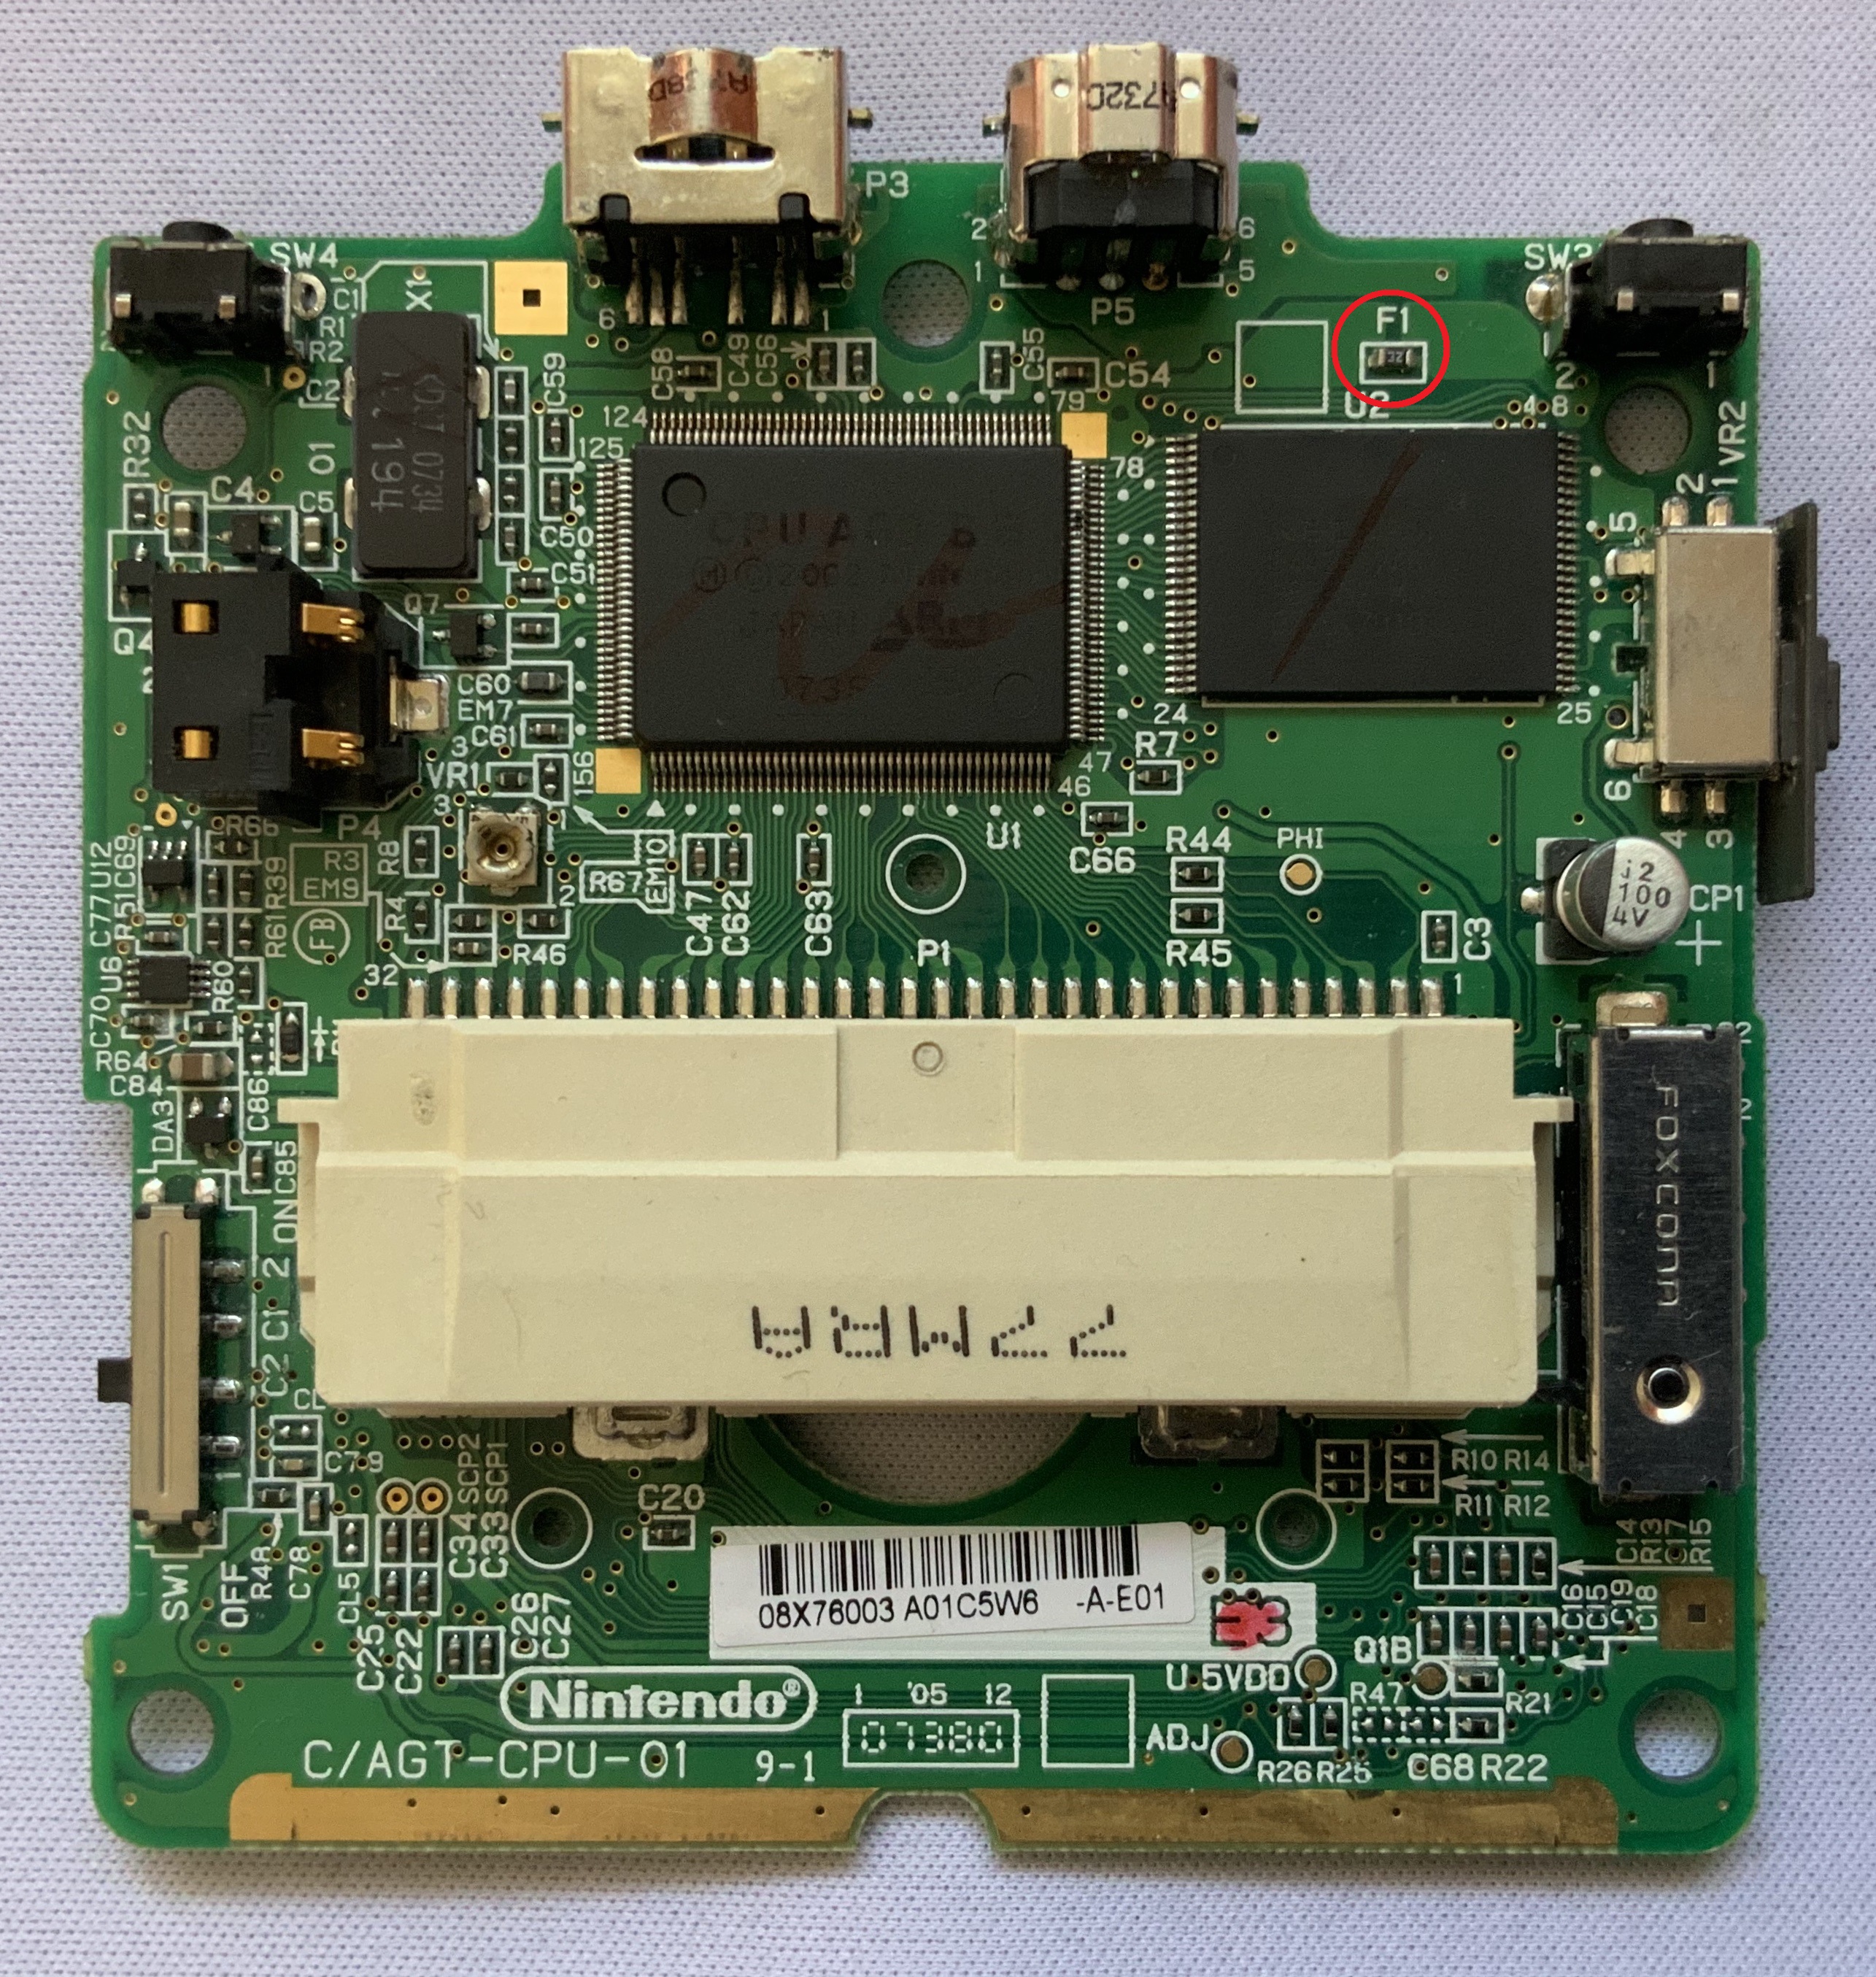
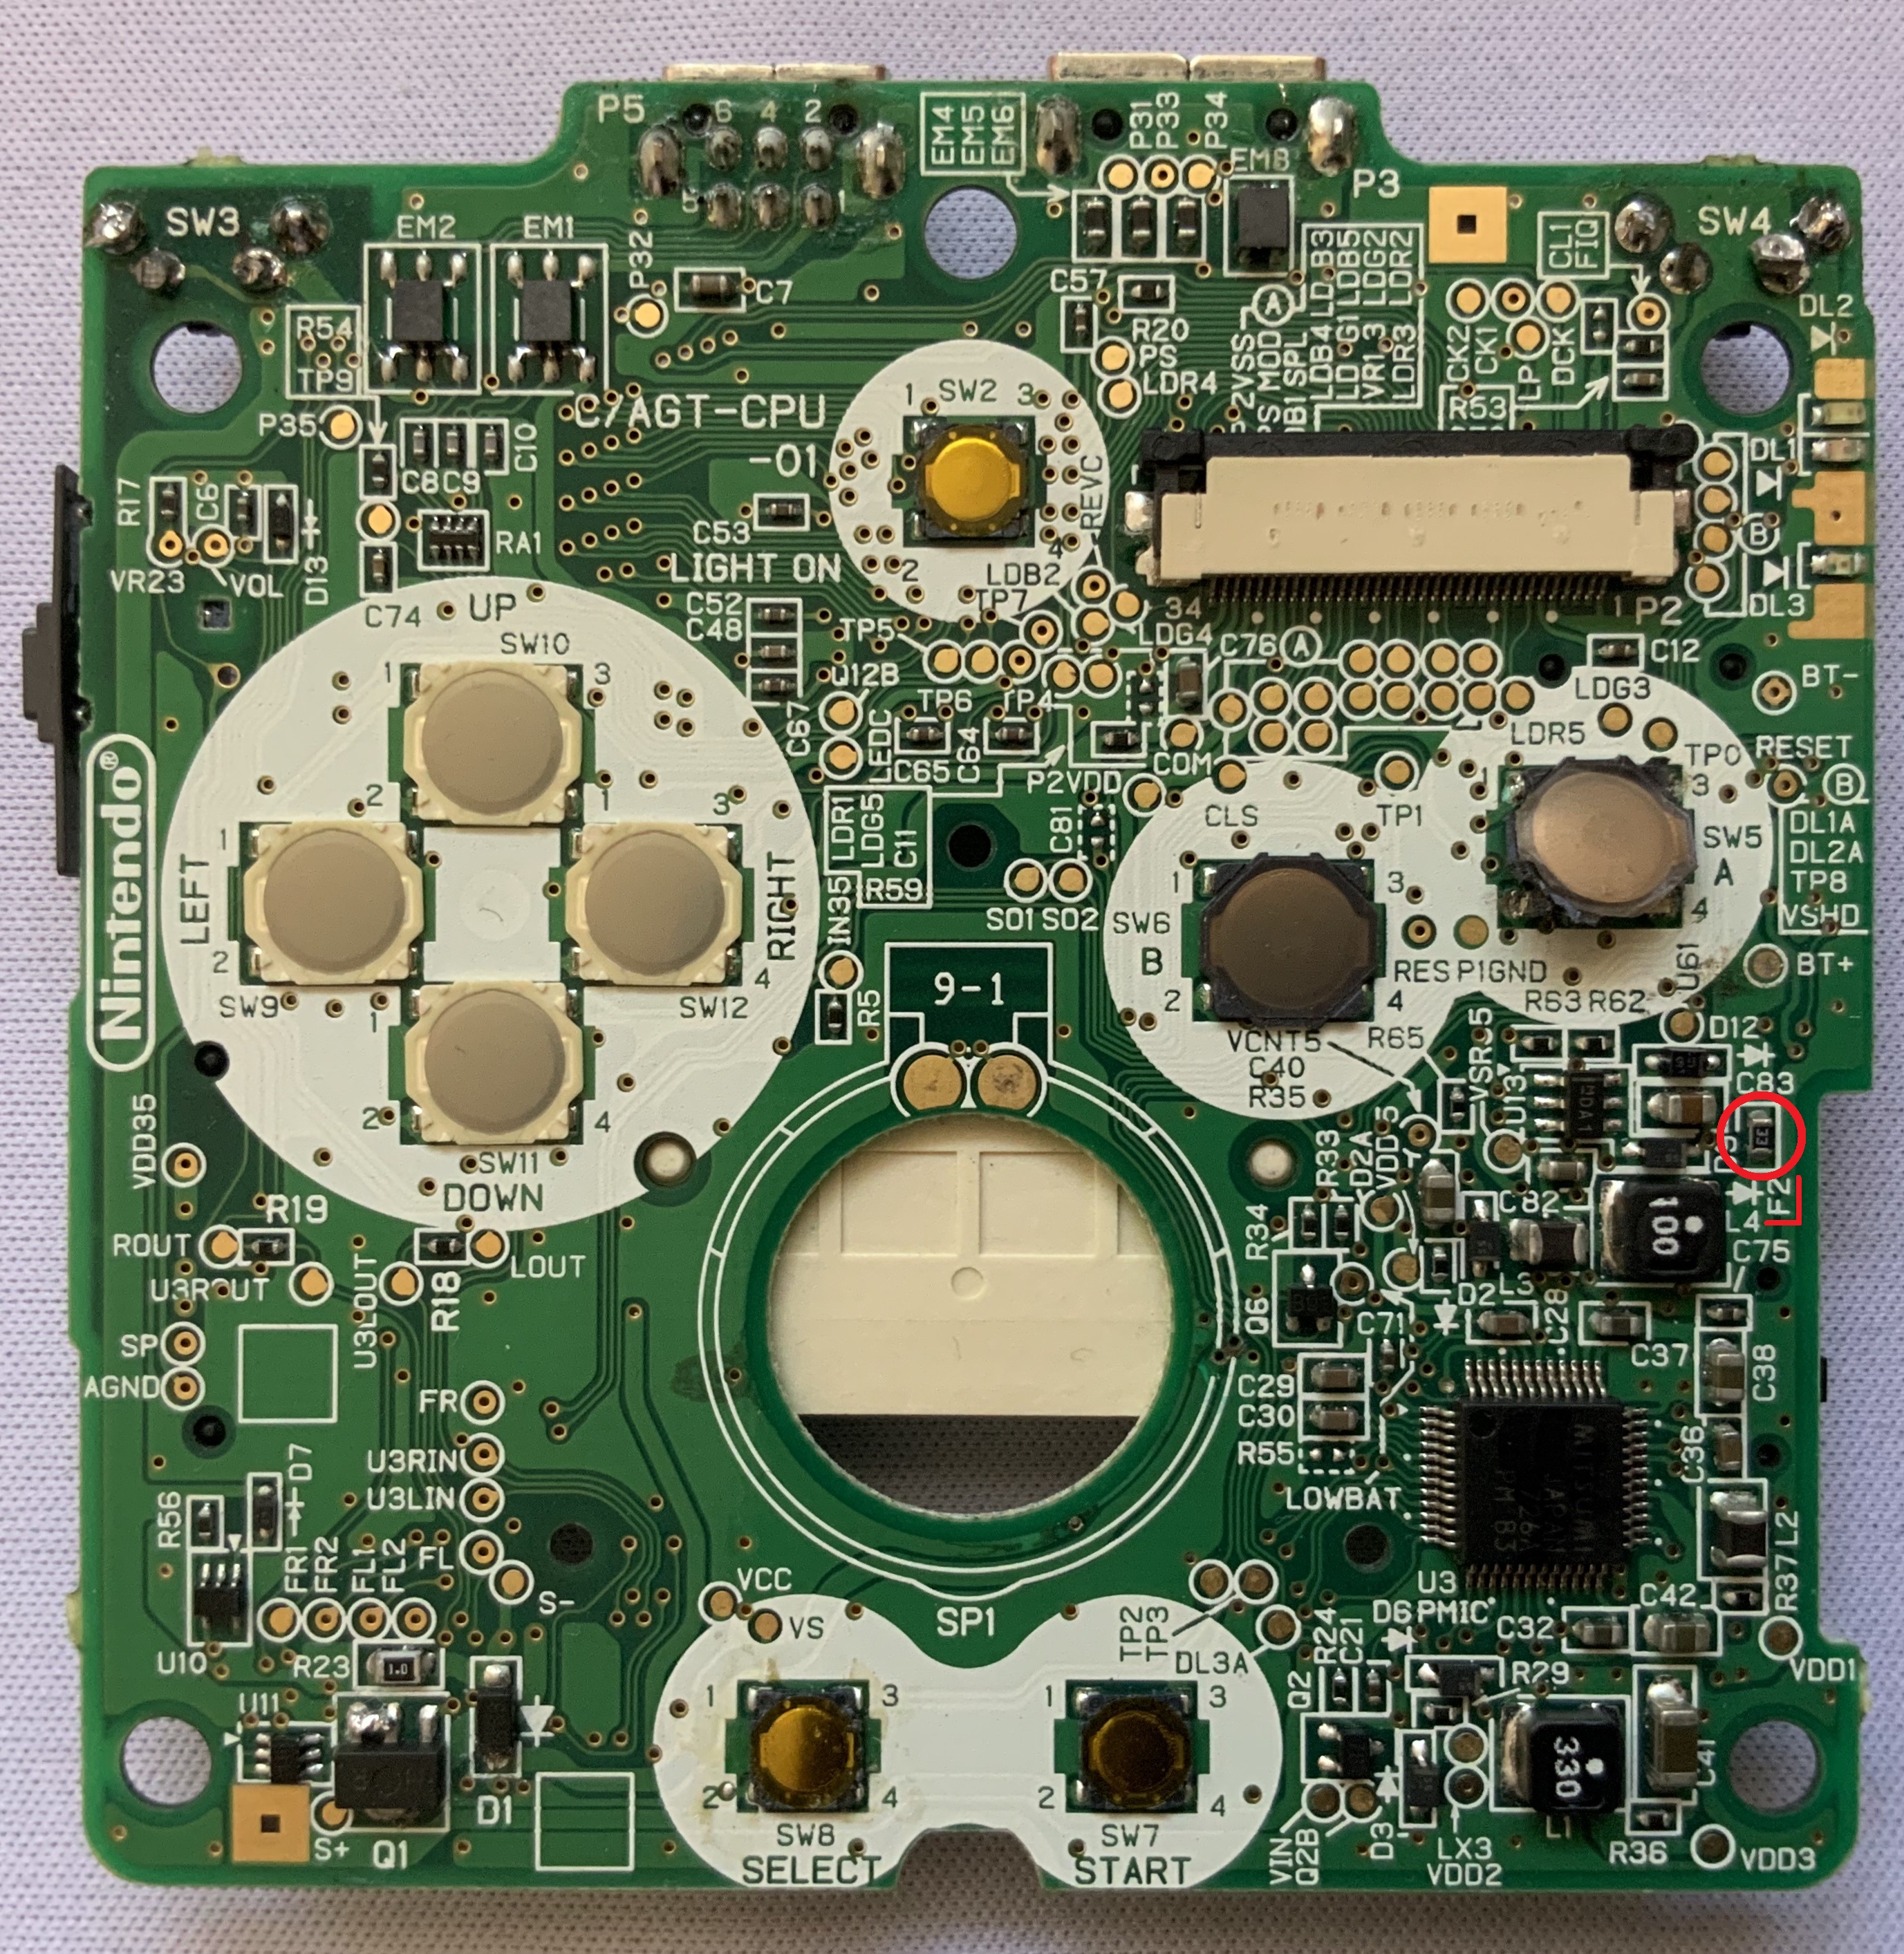
You need to check the fuses F1 and F2 using a multimeter. If there is no signal, then they need to be replaced and the problem is in this.
Fuse F1 is located on the back of the Game Boy Advance SP board:
Fuse F2 is located on the front of the Game Boy Advance SP board:
If the fuse is indeed blown and you're wondering where to get a new one, there are two options: the first is to buy a donor and remove the fuse from it, and the second is to buy fuses on Aliexpress.
No circuit
If you have checked the fuses and the Game Boy Advance SP still does not charge, it may be a broken circuit.
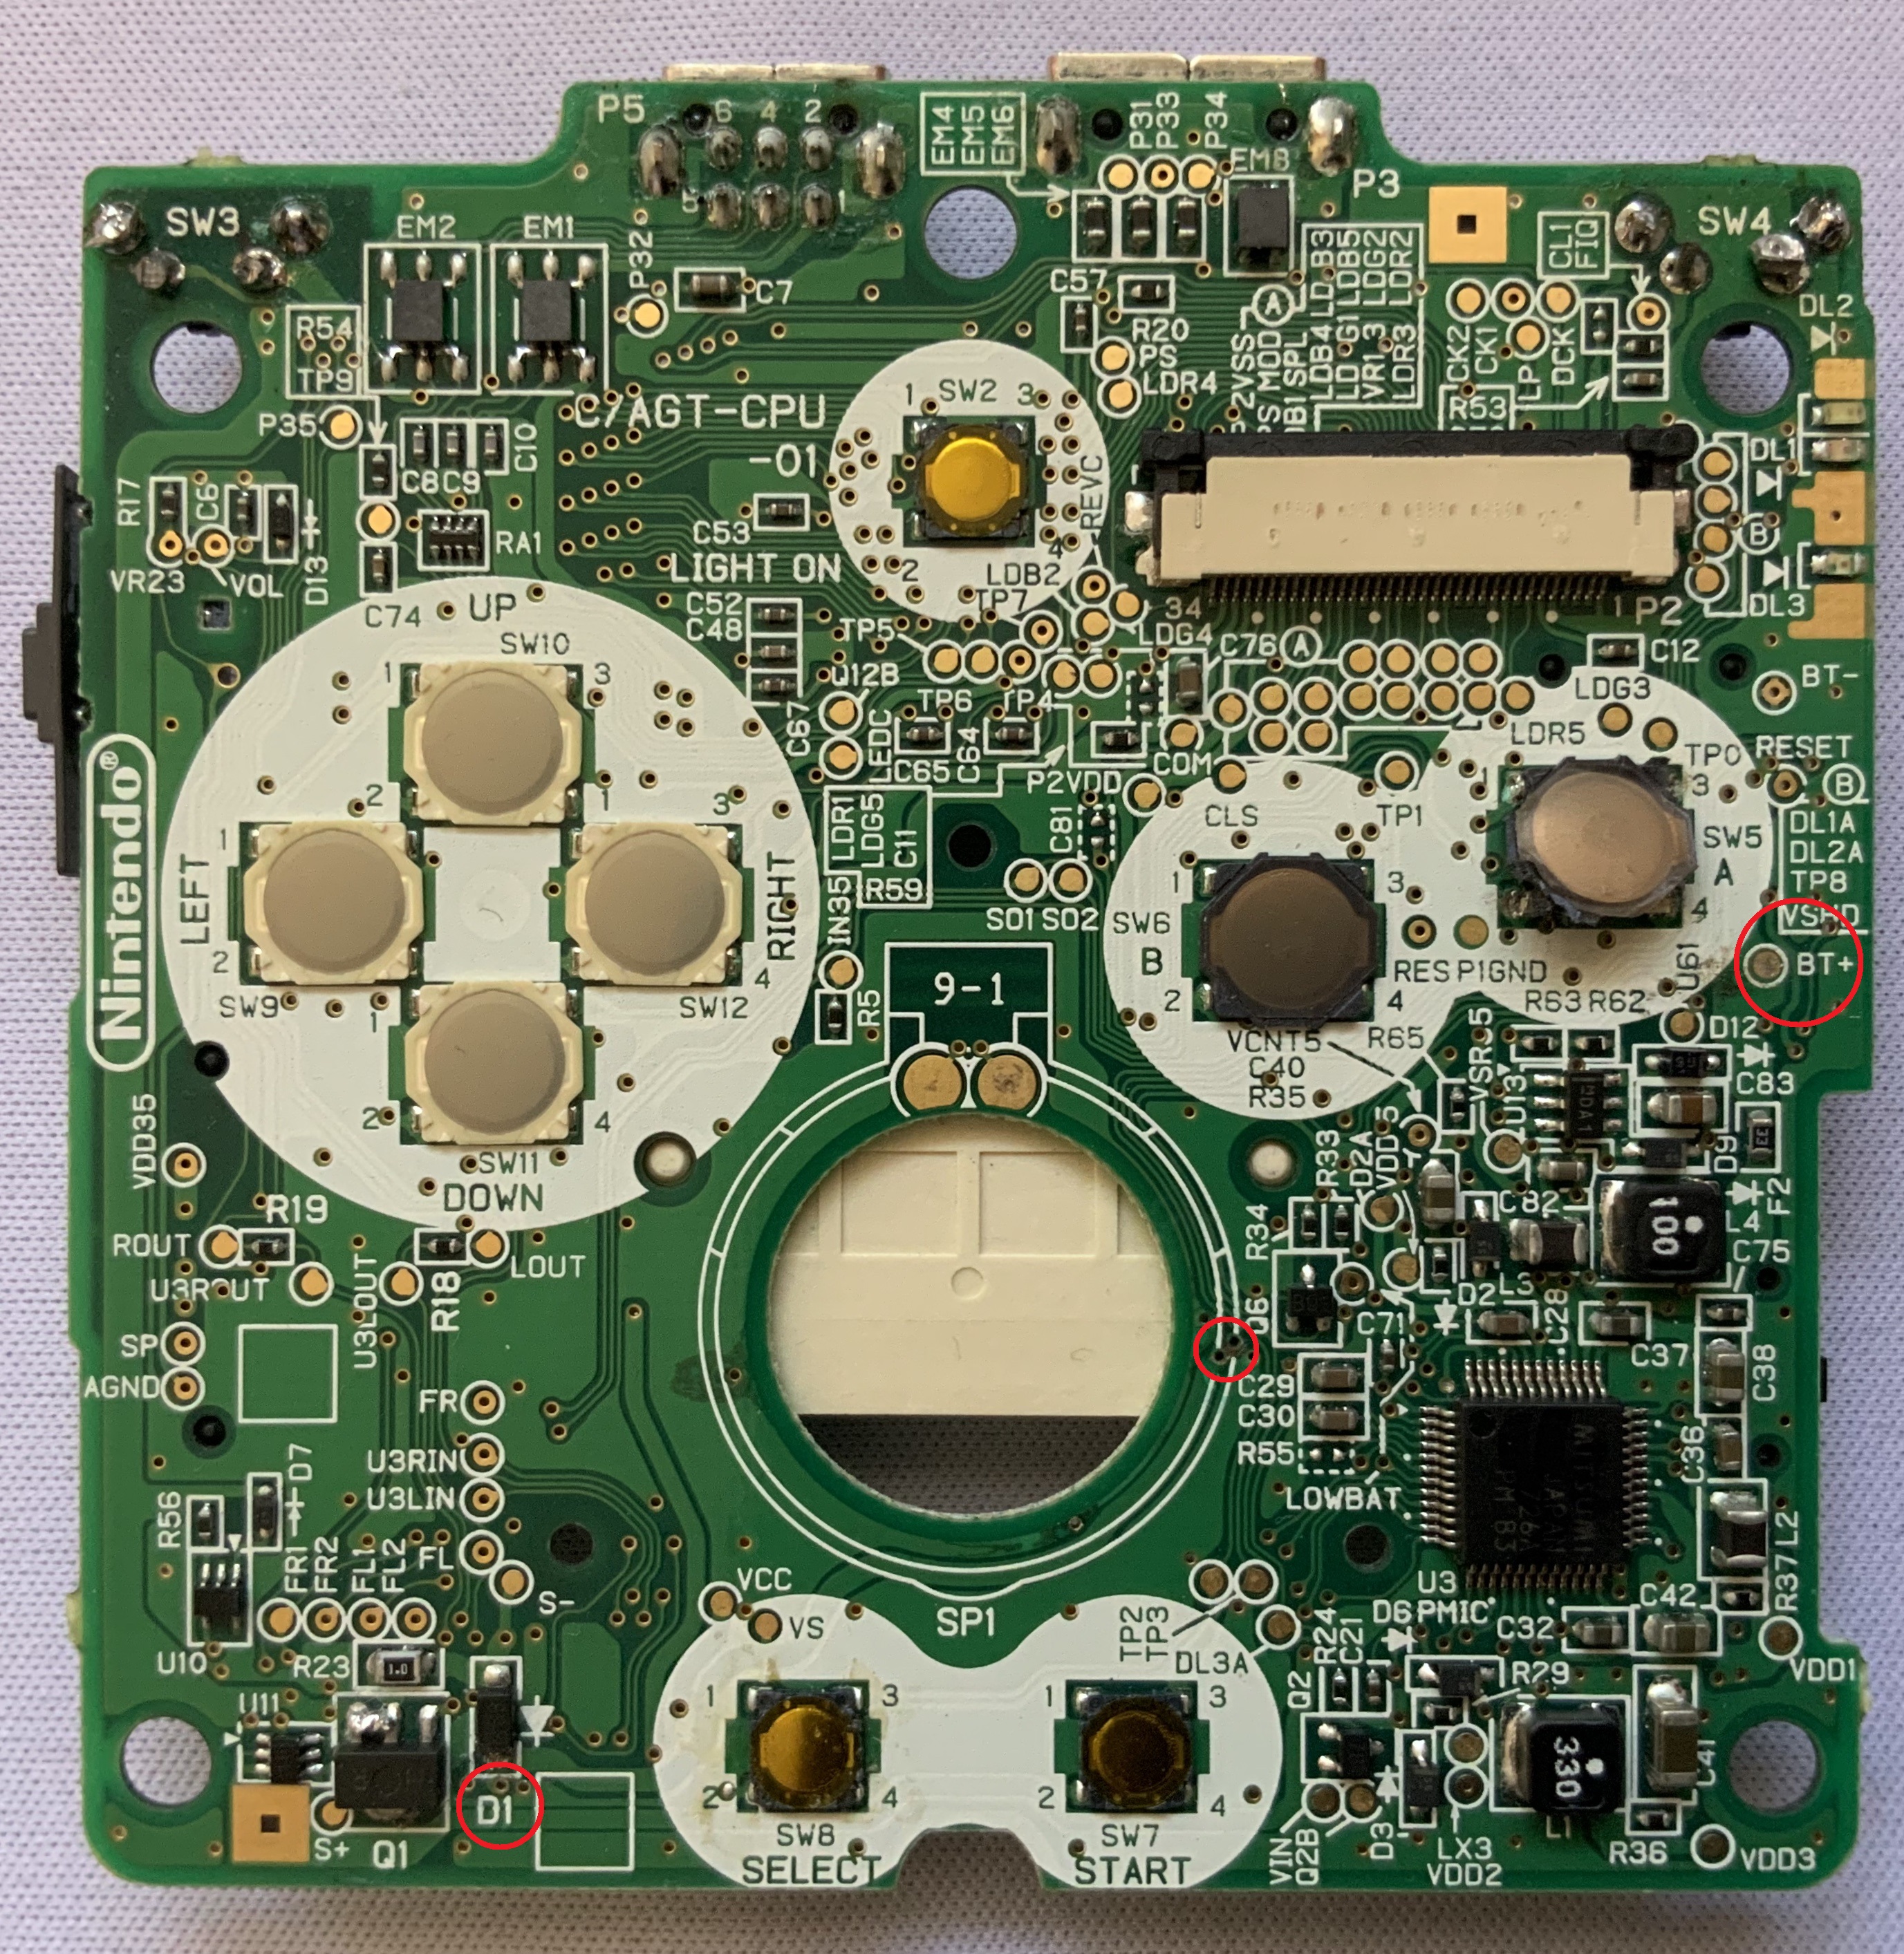
You need to check the contacts from the BT+ element to the D1 element.
If there is no contact, then somewhere along the way your circuit is broken and that's why it's not charging. If you look at the picture, you can see that I have highlighted two more pads in the middle. I highlighted these pads because that's where I had the problem. Water was spilled into the speaker holes, it seeped onto these pads and damaged them.
.png "Game Boy Advance SP repair")
Example repair from the internet
Broken EM8 filter
The last and most difficult thing is to check the power filter, labeled EM8 on the board:
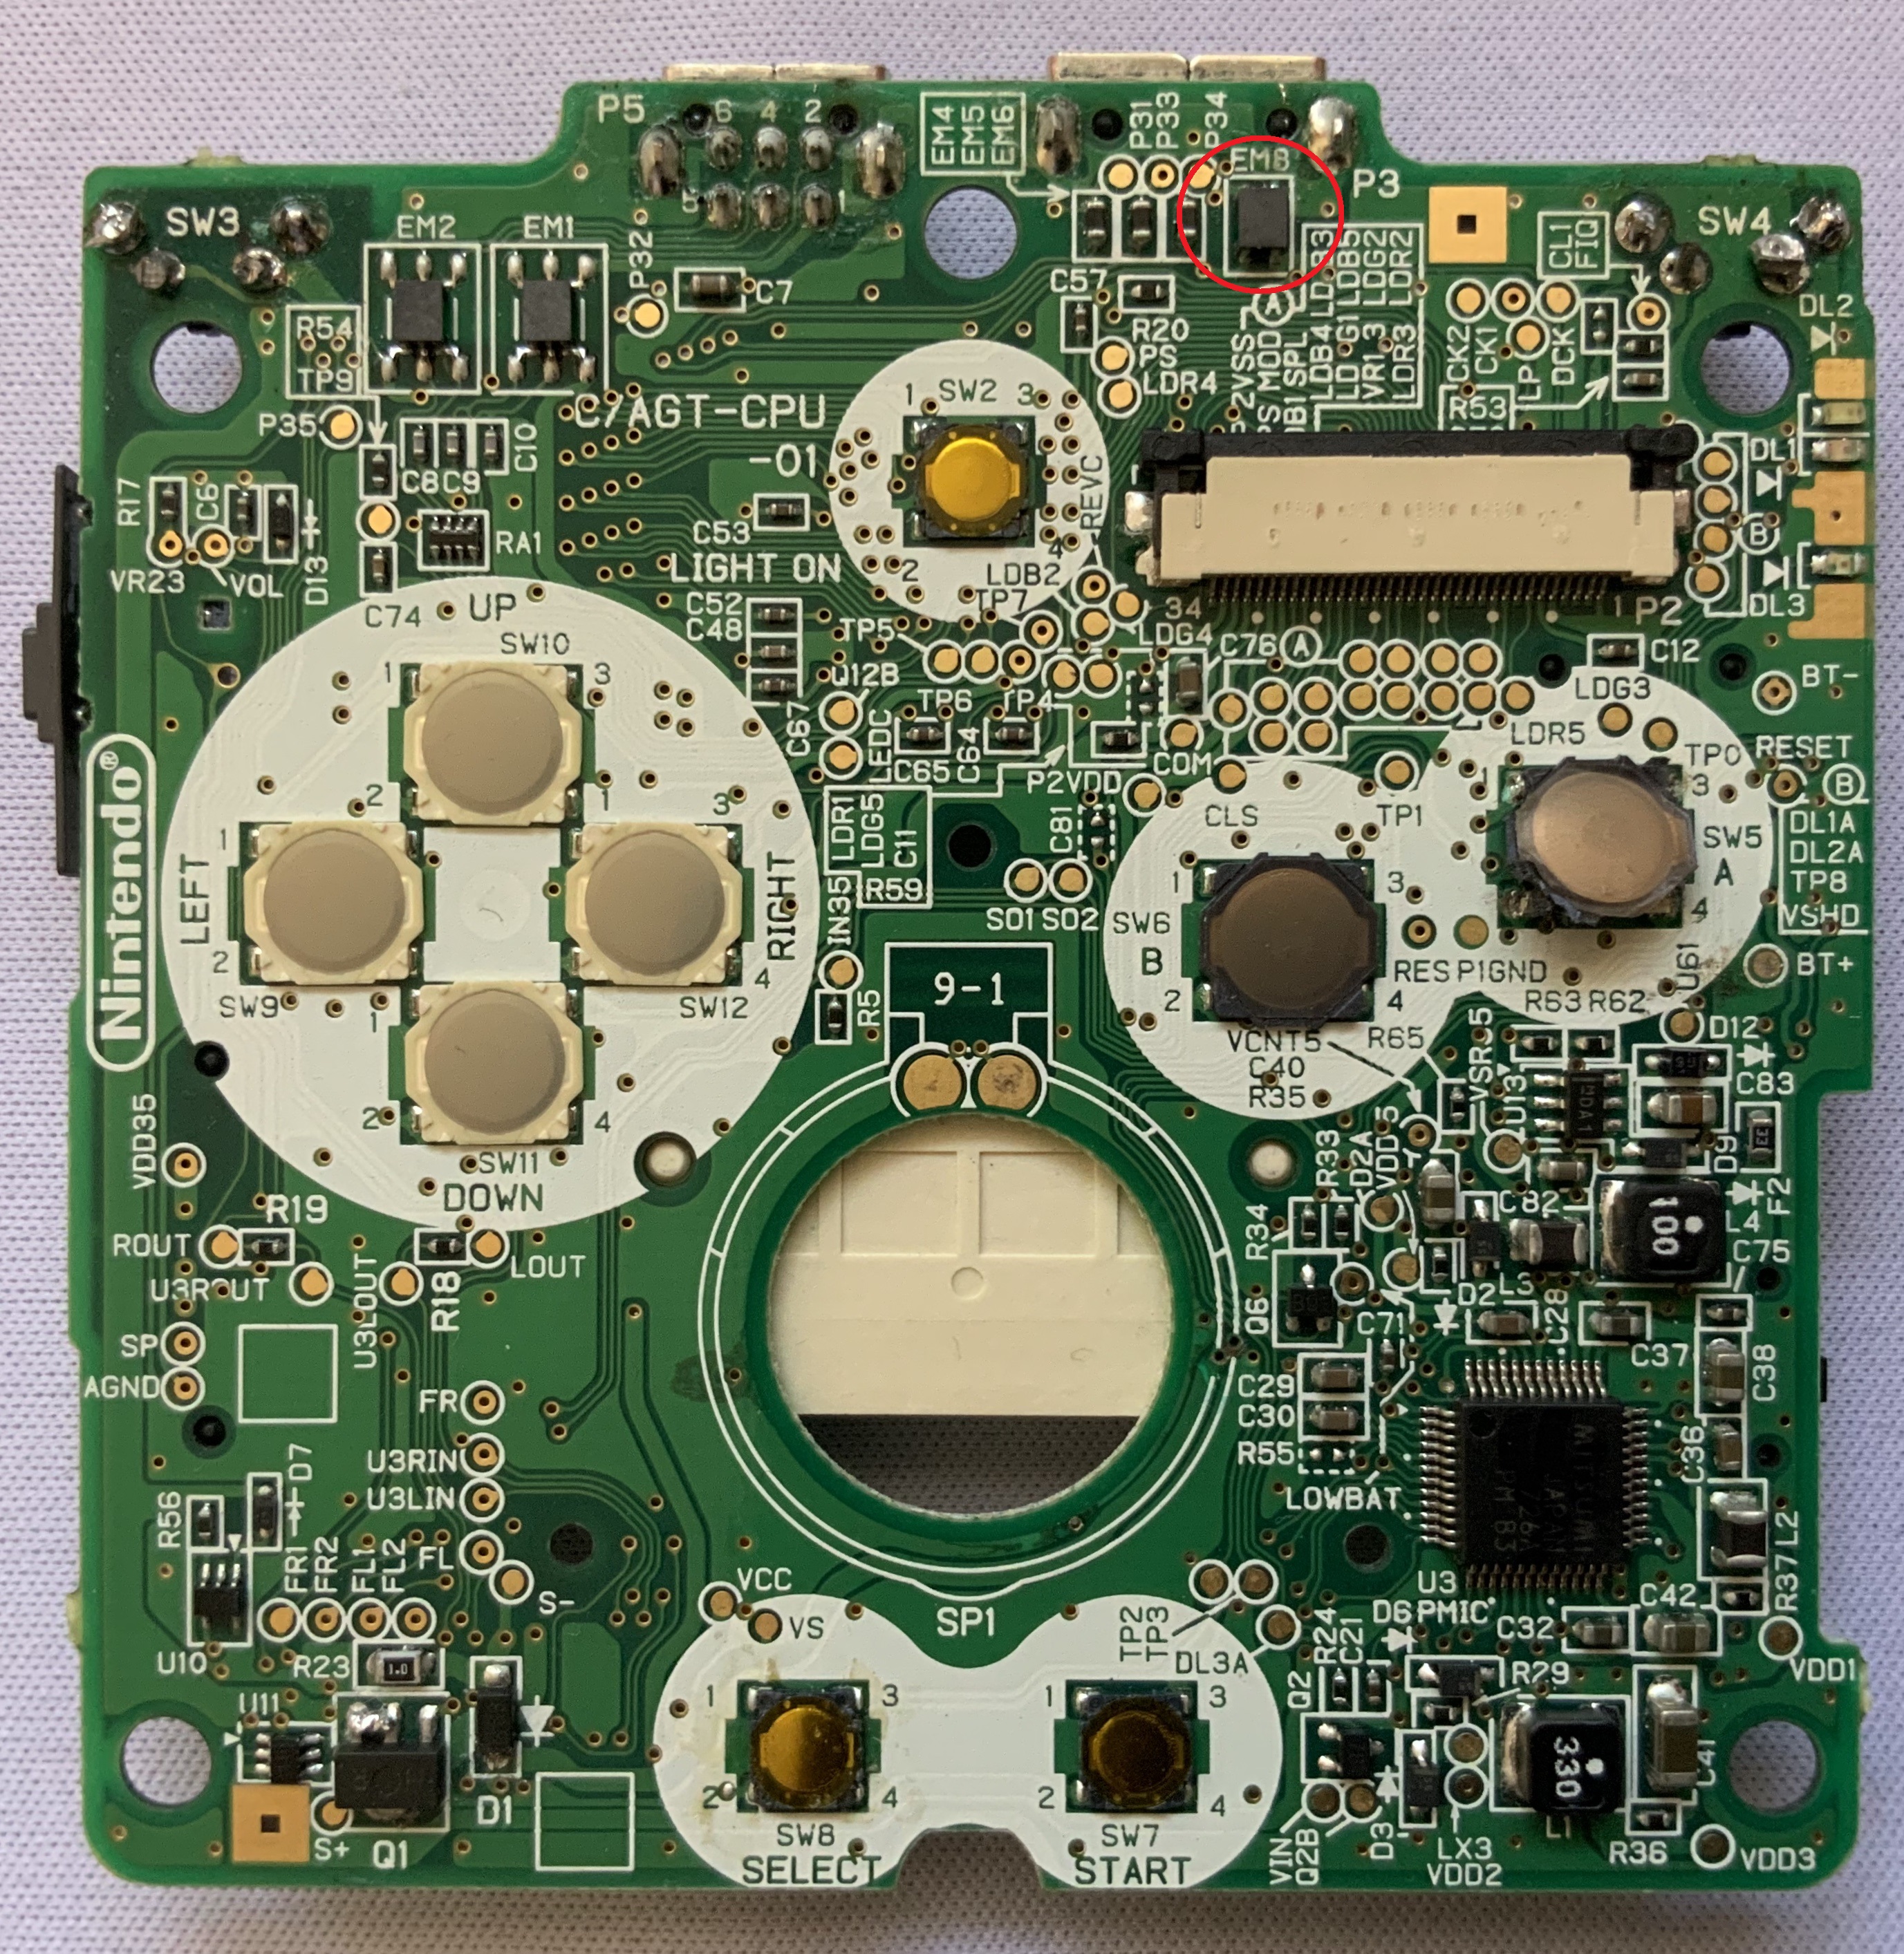
The problem here is that it is very difficult to replace, and a soldering iron won't help, the contacts are very small.
Other
If you are well versed in electronics and the problem is more complicated than those listed above, and this can happen, for example, when water gets through the speaker hole and penetrates under the cartridge connector, then this diagram drawn by user "Uri" might help you:
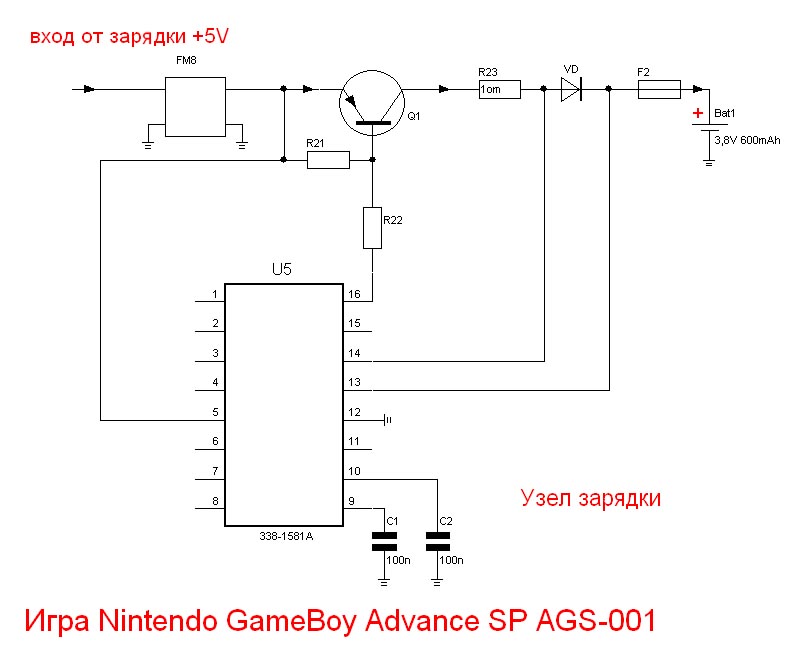
What are the differences in the AGS-101 version?
Instead of the U5 chip, two chips U10 and U11 are used
1. U11 (apparently responsible for the process of turning off the battery charging process)
2. U10 (responsible for the process of turning the console on/off)
What's in parentheses is my thoughts, don't rely on them as the final authority.
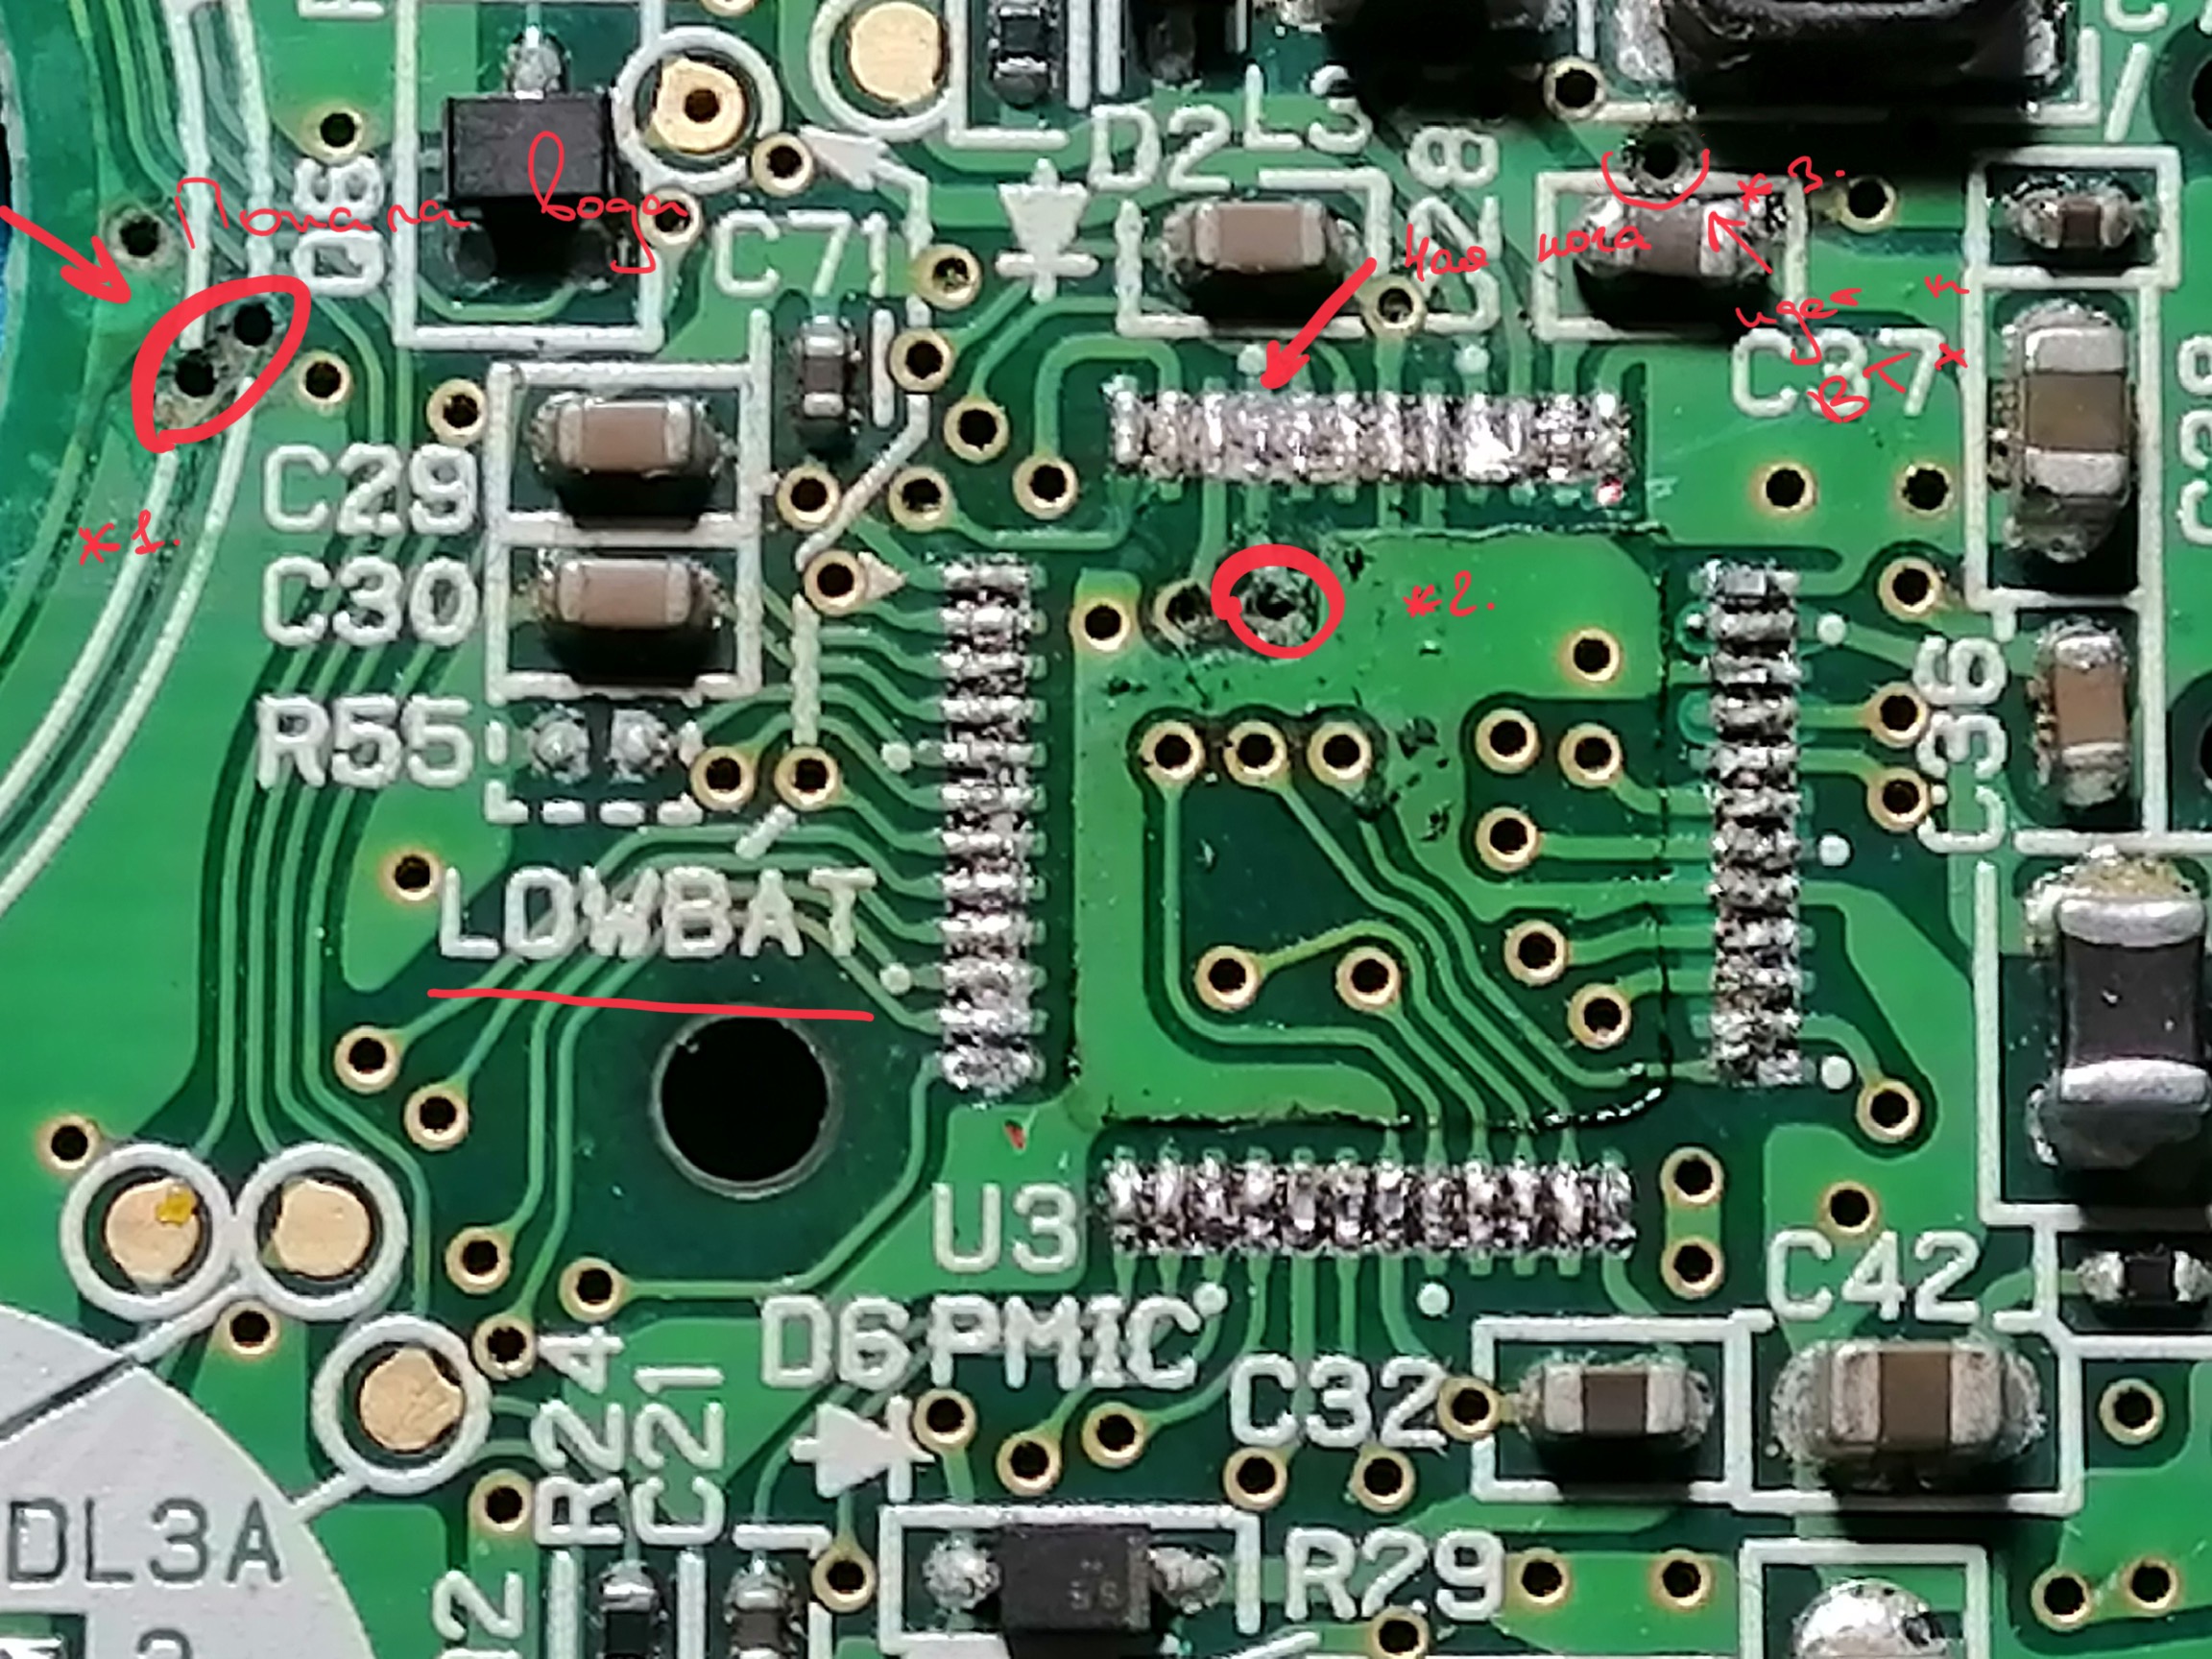
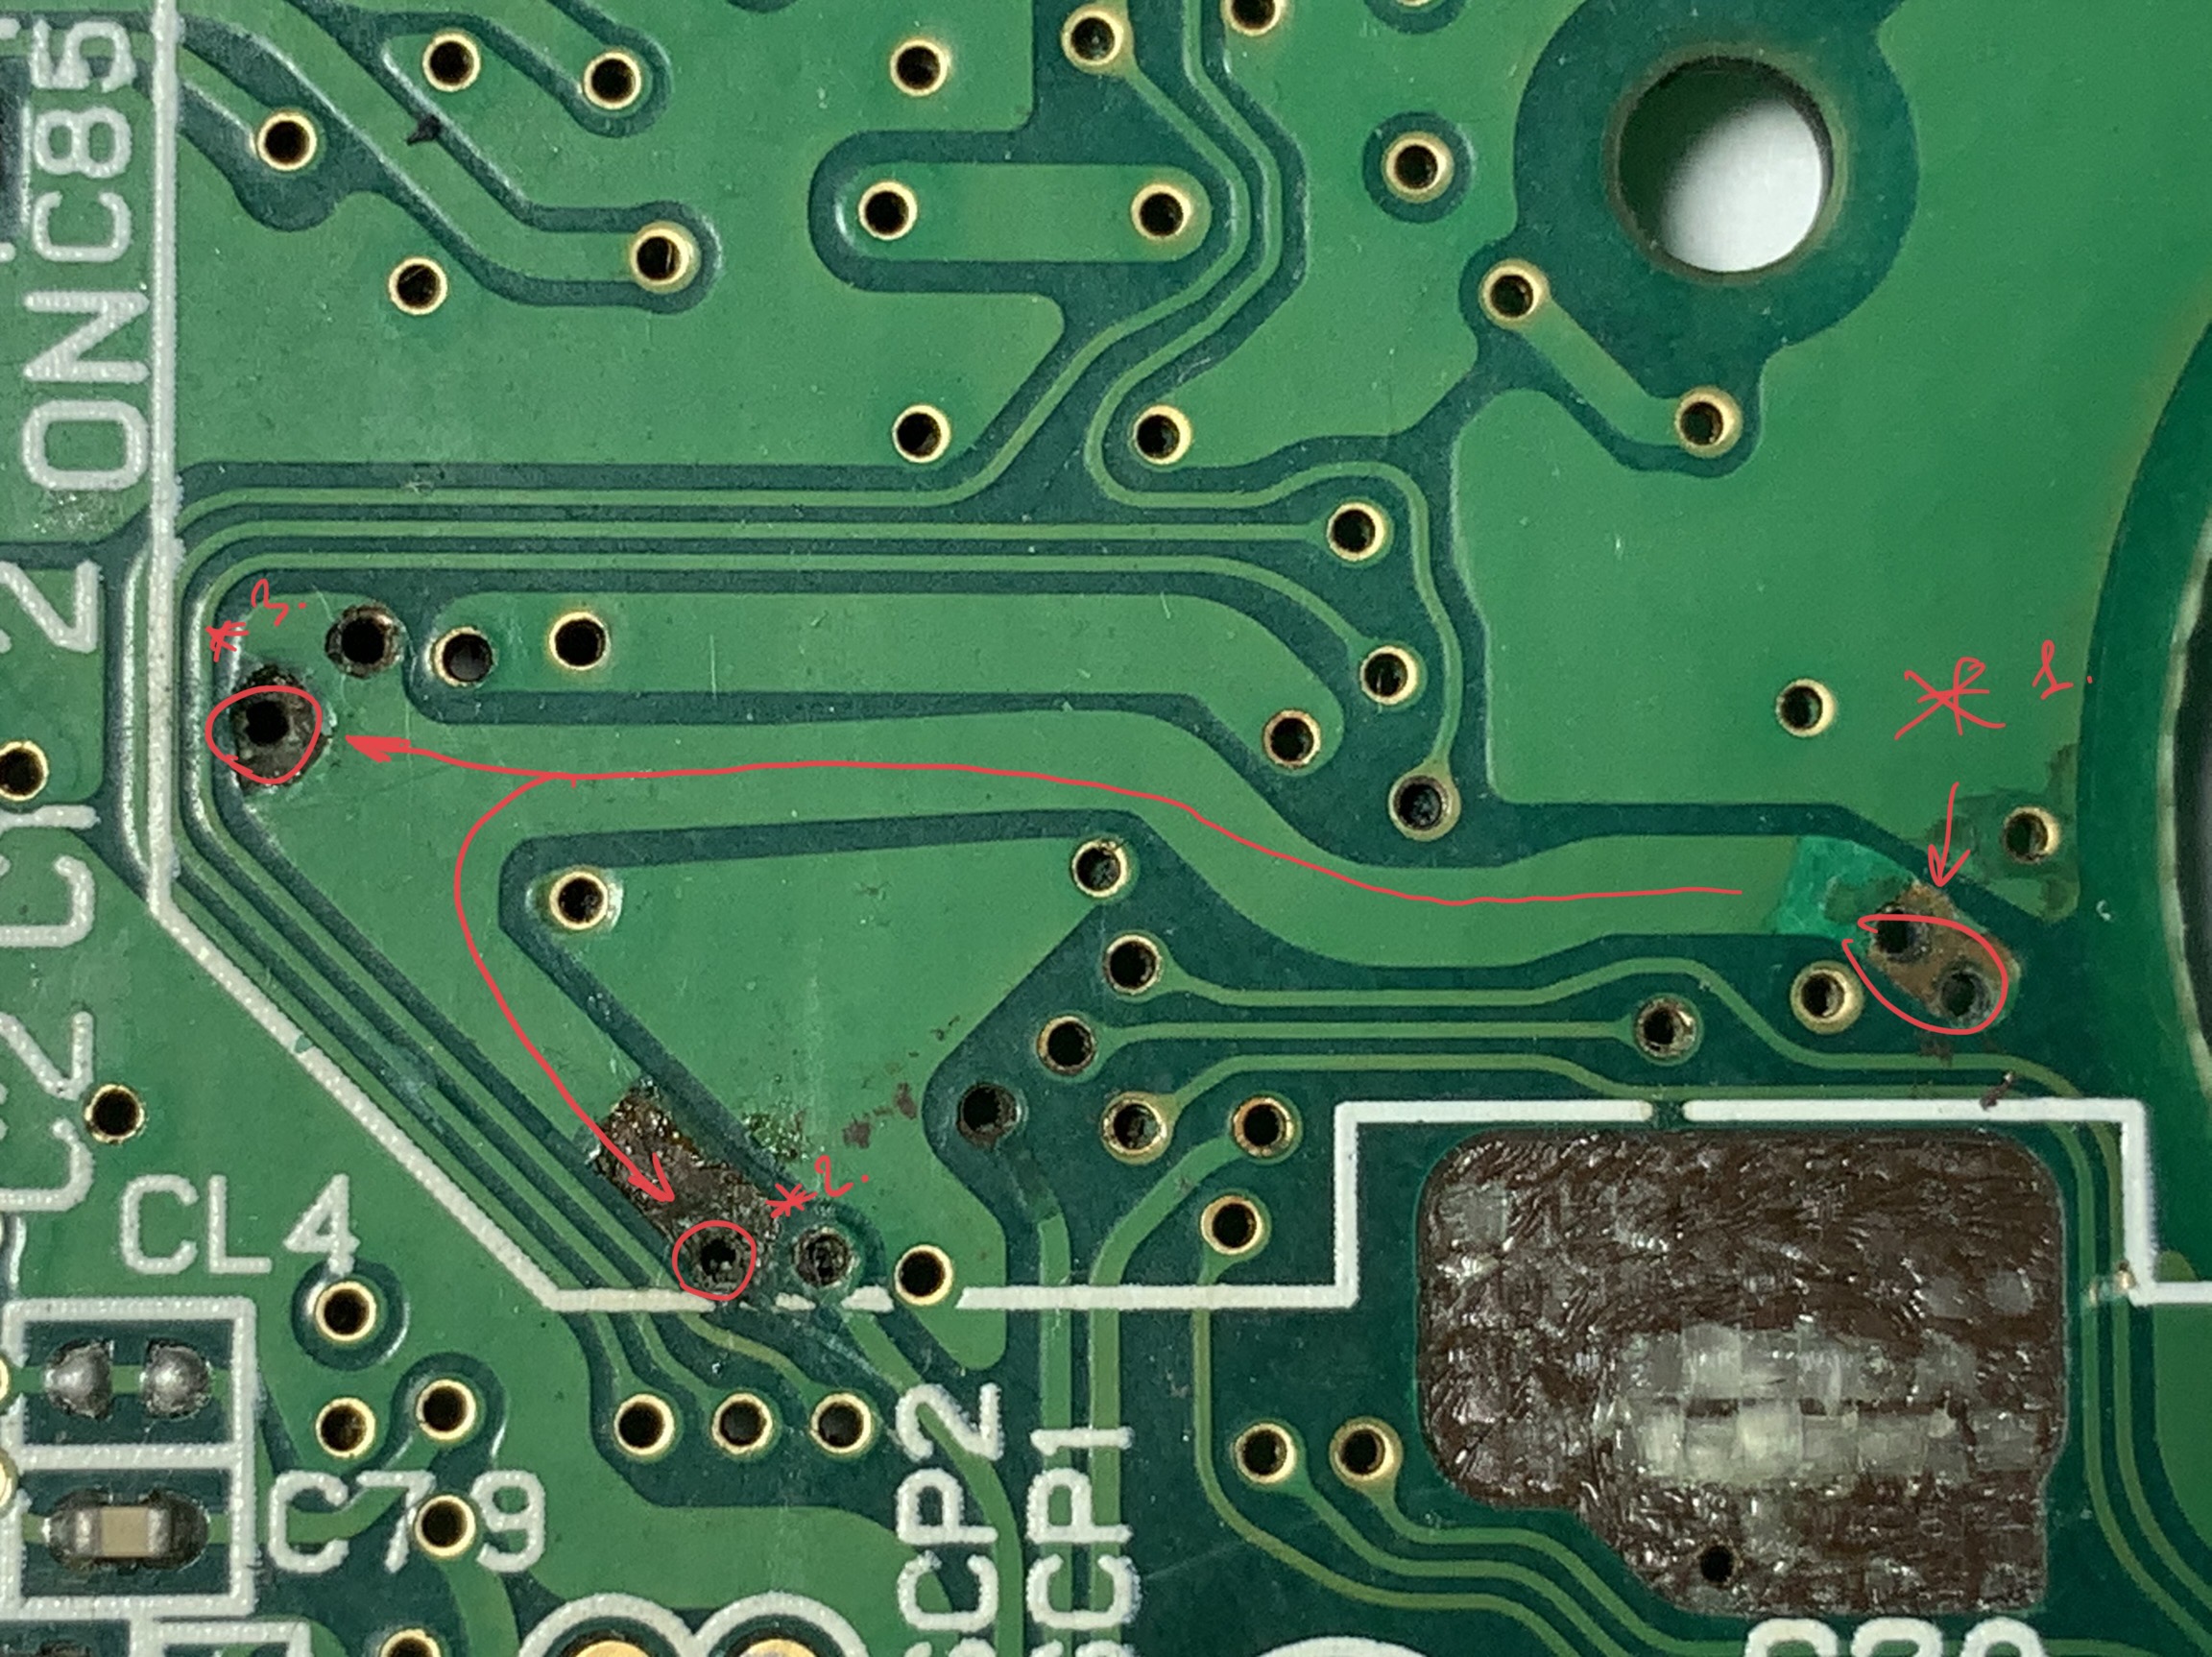
Just in case, I'll leave here a photo of what's under the cartridge connector (pay attention to the area highlighted in red, the power goes directly to BT+, but it also goes under the U3 chip and apparently it is also somehow involved in the charging process, and if you ran a wire from D1 to BT+ and the problem was not solved, then the problem is that the power does not reach the U3 chip):
Friends, now a small digression, all problems except replacing EM8 and removing the cartridge connector can be solved with a regular soldering iron. If you have never used a soldering iron, it's not hard, really not hard. And if your Game Boy Advance SP is not charging, you can buy a soldering iron and fix everything yourself, if you have the desire!